Wednesday, October 12, 2011

Beginner's Soap Making

Here is my first attempt to cold-process soap.  First you need to gather equipment and materials:  stainless steel pot,  candy thermometer, scale, hand mixer, oils, lye, water, glass bowl, wooden spoon, and molds.


Step 1: measure out oils, lye, and water

 Step 2: Heat Oils


Step 3: mix lye with water, be VERY careful, lye is a very dangerous substance and can cause burns, it heats up quickly when added to water.  Add lye carefully to water while stirring (I hold my breath to avoid fumes).  Set aside to cool.
Step 4: When lye and oils are around the same temperature (around 100 degrees F), slowly mix lye into oil.

Step 5: Stir and keep stirring.  I use a hand mixer to speed the process.  Mixture will thicken and when you see a "trace" then it is time to add fragrance and pour.  A trace is when you pull the spoon out and a dribble will sit on the mixture for a second before sinking in (like a thick pudding).


Pour into molds.  Insulate in old blankets or towels. 
Allow to set for 24 hours.
 
After 24 hours, remove from molds and place on cookie cooling racks.  Soap must cure for 4-6 weeks before use.  During the first week, turn every couple of days, and then once a week thereafter.

I researched soap making for several weeks on the internet to prepare myself for this project.  I am pretty impressed with the results.  I need to improve on scents.  I used flower petals from my garden and essential oil but the soap just smells like soap :)

Friday, September 9, 2011

Organic Gardening 2011

 
We built two raised beds this year.  These pics were taken in June before we left for Wyoming.  The first pic is tomatoes, peppers, lettuce, zucchini, and a few onions.


This is our second bed.  It has soybeans, onions, jalapenos, and herbs.
We also had a growing trellis of green beans and a back garden with squash and melons (pics coming soon).  I planted marigolds and calendula in the beds to control insects and it worked!!!  The back garden got attacked by 28-spotted ladybugs and there were no flowers there.  Marigold and calendula are both edible flowers so they are good companion flowers for the garden.  I am going to take some pics of the garden now because most of it is still growing strong during September!!  We used all organic soil and fertilizer this year.  Buds to Blooms provided us with all our growing materials.  I started everything from seed.  Organic seeds were purchased from Johnny's Selected Seeds.  I wanted to start seed collecting this year so it was important for me to see what the seed looked like.
 I collected and dried seeds on an old screen from a window.  I collected flower heads and removed seeds before cooking vegetables.  I even saved soybean pods from the plants when I did not pick them fast enough and they turned brown and started to dry.  I stored the seeds in glass jars that I collected over the year.  Below is a picture of marigold seeds.  They are long and stick-like and they don't look like seeds at all!!  I knew what they looked like because I started the flowers from seed.
 Below are calendula seeds which look like small curly horns!  Again, the importance of starting from seed really came in handy here!
 Here is my collection of seeds.  I leave the lids off for a few days to dry out any moisture, then I put the lids on and store in a dark cool spot in the basement.
 
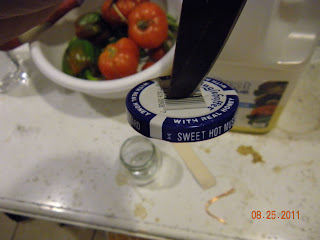
Here is my first attempt at canning.  For future gardening, I will only plant ONE jalapeno plant.  I had 3 this year and an endless supply of jalapenos...even now in September I am picking 5-10 daily.  So, I needed to can some.  I boiled the jars.
 I cooked the peppers with onion, garlic, and olive oil until slightly soft.  Then I put the peppers in the jars with a 50/50 solution of vinegar and water.  Foods that don't have a certain amount of acidity can cause botulism if canned without a pressure cooker so the vinegar is important.
 I don't have an "official" canner so I put a dishtowel in the bottom so the jars don't touch the bottom of the pan (I am not sure why they can't but that is what I read so I did it).
 Boiled for 10 minutes, removed to cool, 5 minutes they popped!
  Jalapenos for future taco nights!!!

 I do plan on updating this blog within the next week with new pics of the garden and details on what I have started for fall gardening!

Friday, August 26, 2011

How to make an oil lamp

You need just a few things things to get started:

A glass container with a lid such as a jar or bottle, a wick that is made of cotton such as a piece of denim or you can purchase lamp wicks, a piece of metal wire, and oil.  The oil can be cooking oil, lamp oil, bacon grease, or olive oil.

Cut a slit wide enough for your wick in the lid of the jar.


Push the wick through the lid and cut enough to overlap a little in the bottom of the container and stick out of the top.


Wrap the wire around the top of the wick to secure it and to allow for the adjustment of the flame.  A longer wick will give you a bigger flame.


Fill the jar with oil and allow the lamp to sit for about a half hour for the wick to absorb enough fuel.

Let there be light!  The huge flame pictured on the left is the one shown in the other pics.  It was a small jar with a larger, longer wick and it is fueled by vegetable oil.  The one on the right is a mason jar and the wick is made from a piece of garden twine and it is fueled by tiki torch oil for outdoor use. 

Monday, August 22, 2011

Building a small off the grid cabin year 1

Setting up camp when we arrived, Jun 30.
 This year we spent the whole month of July in central Wyoming building a small cabin.  The cabin is 16' by 24' with an open floor plan and a small loft.  Currently there is no source of water or electricity but we plan on working on that next year

 The first step to building a cabin is creating a foundation.  Our foundation is a post and pier foundation.  We dug holes 4 feet into the ground (that is the frost line here) then dumped a bag of quikcrete into the hole and set a 6x6 post.  These posts must set overnight to before building the floor.  Our cabin required 10 posts for proper support.


After the foundation, a floor is laid.  First we positioned joist hangers (metal brackets to  hold the floor boards in place) 16" apart on center.  Then 2x12x16 boards were placed in the hanger and screwed.  The 4 center floorboards were doubled up for added strength.  Then plywood was positioned on top of the floor boards and screwed down.


 The walls were built with 2x6 studs to allow for extra insulation.  The windows and door were measured and the walls were built to fit them.
 It took four men to raise the walls and secure.  There are temporary supports inside to protect the walls against the strong Wyoming wind.
 After the walls went up, plywood was screwed to the studs.  A sawzaw was used to cut out the windows and door.  Supports were added to the top.
House wrap was stapled to the outside to provide protection against the weather.  We had two gables pre-made for us to exactly fit our roof and desired pitch.  This made it easier to cut and lay the rafters.  Putting the gables in place was difficult but made the rest of the roof easier.


 The most difficult part is pictured above to the left.  Placing the ridge beam.  The beam is extremely long and heavy. After the rafters are in place, plywood is laid on the roof, pictured above right.


After the roof is complete, windows and a door were put into place.   Now it looks like a house!


The whole project costs us about $6000.  It took about 23 days to build it with a few days of down time.  We had only about 3 people actually working on it.  A 4000 watt generator ran all the power tools needed for construction.  We had a friend that has previous experience in building that measured and cut all of our materials.  He also had a tractor that was used to clear the plot and dig the foundation holes.  We ran into some issues with materials because our original plan was not drawn to support the weather in Wyoming and we had to make adjustments.  These adjustments cost us time and money because we had to return materials and purchase new ones.  Be sure to have someone evaluate your plans and material list before purchase to ensure it will withstand the conditions.  Although my husband has had years of experience in construction, having a friend that had built cabins in the area was a HUGE help.  He provided so much knowledge to our building process.  Building a structure from scratch is not easy, no matter how much construction experience you have, especially in a different climate.  I strongly suggest seeking help from an experienced individual to help you with your project. 
We purchased the siding and enough lumber to build a porch but unfortunately we ran short of time.  Our future plans include building a cistern water system and a solar and wind electrical system.  We need to add insulation and a woodstove for the cold months.  We also would like to build foldable bunk beds for the kids.